

18 August 2017
Having had the opportunity to use and provide feedback for Alteryx Connect over the past 5 months, I was really excited to see it get its full release this week. As a data catalog tool, it's going to be really interesting to see where it goes. I've gotten to know some of the team behind it I'm sure we're going to see lots of innovations over the next few years.It is, however, a v1 product which means there's loads of opportunity for tech geeks like us to blog about how to make one or two of the rough edges a little smoother. And today I'm going to start with SSL.Keep it
The green padlock has become a standard expectation for web users now. If you're not sure what that symbol means it's an indicator that everything in the web page you're looking at has been sent from the web server to your local browser using an encrypted communication method known as SSL (Secure Sockets Layer). Put basically even if somebody was to intercept the communication between the web server and your browser they wouldn't be able to read it. This is really important for ensuring that snoopers can't intercept your login details for applications accessible via the public internet.Unfortunately, Alteryx Connect doesn't ship with any SSL configuration as standard. So we need a 3rd party tool to keep our communication secure. src: Wikimedia Commons[/caption]Many IT departments use load balancers to not just provide high availability to their applications, but also as a single, secure point of entry to their network from the outside world. If you have a load balancer in your organisation then great. Just point it at Alteryx Connect using port 80 and configure it to communicate with the client using SSL on port 443.3. Use a Reverse Proxy[caption id='' align='alignnone' width='301']
 src: Wikimedia Commons[/caption]Usually, when people here about proxy servers it's in relation to a call with their IT support desk which goes 'So I understand you can't get onto BBC iPlayer, we need to check your proxy settings.'In this case though, and there are no prizes for guessing, that instead of helping web traffic get out of a network, a reverse proxy helps web traffic get into a network. It does this by forwarding any traffic it receives onto other servers, based on a preset list of rules. Now what a reverse proxy brings to the Alteryx Connect table is a destination where traffic can be sent over SSL port 443 and then converted to unencrypted traffic on port 80 before being sent on to the Alteryx Connect Server.
 On your Linux box, you need to install NGINX. For Ubuntu this simply is:
Keep it 
The green padlock has become a standard expectation for web users now. If you're not sure what that symbol means it's an indicator that everything in the web page you're looking at has been sent from the web server to your local browser using an encrypted communication method known as SSL (Secure Sockets Layer). Put basically even if somebody was to intercept the communication between the web server and your browser they wouldn't be able to read it. This is really important for ensuring that snoopers can't intercept your login details for applications accessible via the public internet.Unfortunately, Alteryx Connect doesn't ship with any SSL configuration as standard. So we need a 3rd party tool to keep our communication secure.The Options for SSL
In terms of setting up SSL for your Alteryx Connect instance, you've got a couple of options.1. Don't BotherNot worrying about it is a legitimate option if your Alteryx Connect instance is only going to be accessible from within your company's network. While it's still possible that somebody who works for the company could intercept usernames and passwords, the risk-reward ratio means it's probably not worth it. Especially as they'll likely have their own access to connect.2. Use a Load Balancer[caption id='' align='alignnone' width='166'] src: Wikimedia Commons[/caption]Usually, when people here about proxy servers it's in relation to a call with their IT support desk which goes 'So I understand you can't get onto BBC iPlayer, we need to check your proxy settings.'In this case though, and there are no prizes for guessing, that instead of helping web traffic get out of a network, a reverse proxy helps web traffic get into a network. It does this by forwarding any traffic it receives onto other servers, based on a preset list of rules. Now what a reverse proxy brings to the Alteryx Connect table is a destination where traffic can be sent over SSL port 443 and then converted to unencrypted traffic on port 80 before being sent on to the Alteryx Connect Server.Installing a Reverse Proxy
Again there are lots of options for software which can act as a reverse proxy. If you'd like to stay in Microsoft Windows land then that good old service IIS can do the job. The folks at Alteryx have detailed how to set this up in a pdf available for download. Unfortunately, as it's Microsoft it's some 28 pages long and involves a whole bunch of plugins.For my reverse proxy, I'm going to go with NGINX which is a Linux-based web server.PrerequisitesSo what do you need to get started?- A Linux Server. For me this was Ubuntu 16.04 LTS. It doesn't have to be a big server, I'm running 8GB RAM, 2 vCPU
- Your server configured to connect to both the internet and your internal network
- Access to, or the person who controls, your company's DNS settings
- An SSL certificate for your Alteryx Connect URL seperated into .cert and .key files.
sudo apt install nginxOnce complete we'll need to remove the default behaviour of NGINX to be a web server by removing its default configuration file.
sudo rm /etc/nginx/sites-enabled/defaultWe now need to store your SSL certificate and key files on the server. In my instance I'm going to run:
sudo mkdir /etc/nginx/sslYou can then move the files into that folder or open the .cert and .key files with a text editor and paste them into their respective files:
sudo nano /etc/nginx/ssl/myCert.certsudo nano /etc/nginx/ssl/myKey.keyNow we want to create a config file for our reverse proxy. In my case I want Alteryx Connect to be accessed using the URL connect.theinformationlab.co.uk. You can substitute with your own URL where you see it.
sudo nano /etc/nginx/sites-available/connect.theinformationlab.co.ukIn this new file copy and paste the following config:
server {listen 80;server_name connect.theinformationlab.co.uk;return 301 https://$server_name$request_uri;}server {listen 443 ssl;server_name connect.theinformationlab.co.uk;# add Strict-Transport-Security to prevent man in the middle attacksadd_header Strict-Transport-Security 'max-age=31536000';client_max_body_size 200M;ssl on;ssl_certificate /etc/nginx/ssl/myCert.cert;ssl_certificate_key /etc/nginx/ssl/myKey.key;location / {proxy_pass http://33.0.0.10:80;proxy_set_header Host $host;proxy_set_header X-Real-IP $remote_addr;proxy_set_header X-Forwarded-For $proxy_add_x_forwarded_for;proxy_set_header X-Forwarded-Proto $scheme;proxy_read_timeout 600;client_max_body_size 200M;}}There are a few lines in this config to take note of.server_name connect.theinformationlab.co.uk; - Substitute connect.theinformationlab.co.uk with your own URL for Alteryx Connect. This appears twice in the file.client_max_body_size 200M; - The Alteryx Connect loaders can publish a bunch of data with each update so we need to override the default.proxy_pass http://33.0.0.10:80; - This should be modified to be your internal address and port for the actual Alteryx Connect server.proxy_read_timeout 600; - When publishing lots of data you need a bit more time to receive it. Again we need to overwrite the default.OK so now we've got our config sorted we just need to create a symbolic link into the sites-enabled directory:sudo ln -s /etc/nginx/sites-available/connect.theinformationlab.co.uk /etc/nginx/sites-enabled/connect.theinformationlab.co.ukTest that you don't have any typos in your config:
sudo service nginx configtestReload NGINX:
sudo service nginx reloadAnd you're done. You should now be able to access your Alteryx Connect server via https (which in my case is...) https://connect.theinformationlab.co.uk
One Last Thing
Remember when you installed Alteryx Connect? Towards the end of the install you were asked for the URL you'd be using to access Connect. This may now be different via the reverse proxy, probably because it will start https:// instead of http://, than the one your originally configured. If that's the case here's how to update your settings.- Sign into the Alteryx Connect interface as a user who belongs to the Administrator group.
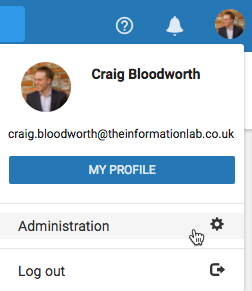
- Click on your profile avatar in the top right corner and select 'Administration'
- Choose 'Export' from the Admin Menu and click 'Export Configuration Files'
- Unzip the downloaded archive and open 03_GLOBAL/global-config.xml with your favourite text editor
- On line 3 between the <base-url></base-url> tags is the URL you originally configured. Change this to the new URL (in my case <base-url>https://connect.theinformationlab.co.uk</base-url>)
- Drag and drop this global-config.xml file into the Upload card of the Alteryx Connect Administration Console.
- No restart needed, your server's URL has now been updated. Enjoy!